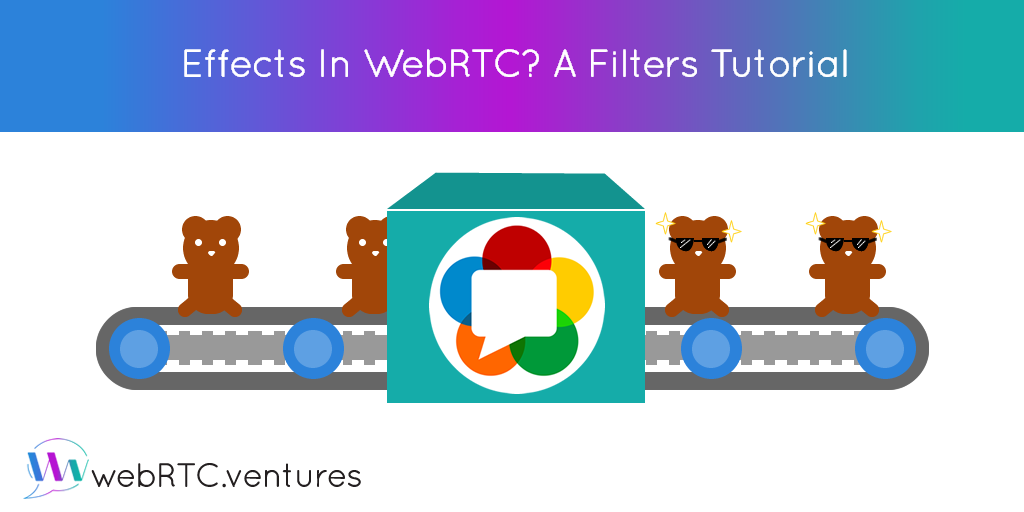
Back in 2015, we shared an article about how to apply effects to WebRTC in realtime. Since then a few things have changed and that’s why today we bring to you a new post about effects in WebRTC, but this time approaching one of the most popular features of today’s social media apps: filters.
Requirements.
To follow along you’ll need at least Git, Node and NPM installed. Installation steps for each operating system will vary, so refer to official documentation when needed.
Once you have everything installed, we will work on top of a running WebRTC application. For this tutorial we will use the webRTC branch of our webrtc-video-conference-tutorial github repo. (There is an eCourse related to it that you may want to check out)
The resulting code of the tutorial is available at webrtc-filters-tutorial repo.
The What, the When and the How.
The main purpose of this tutorial is to be able to establish a WebRTC call and apply a filter to the video stream that we are sending to the other user. To do this we should somehow manipulate the stream we get from the getUserMedia API and then add it to the RTCPeerConnection object.
In order to achieve this, we will use the Canvas HTML tag to draw our filters and then we’ll get the stream using theCanvas.captureStream method.
Another thing we need to do is to implement face detection to be able to draw filters correctly, to do so we will use the face-api.js API.
With that said let’s get the ball running.
The Steps.
First thing to do is to clone the base repo and switch to webrtc branch. To do this from the terminal, navigate to an appropriate folder and run the following commands:
git clone git@github.com:agilityfeat/webrtc-video-conference-tutorial.git

cd webrtc-video-conference-tutorial

git checkout webrtc
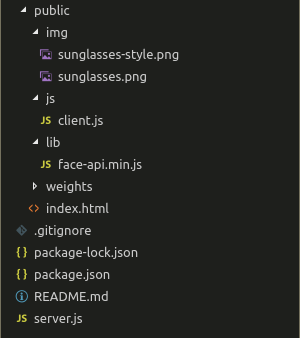
Now we have to do a few changes to the file structure. First we will move the client.js file to its own js folder and after that we will add the face-api.js API. Download it from here and place it under libfolder, also download the weightsfolder and put it under public. You can also download these files from official repo.
We also need to add the images that we will use as filters, you can use whatever you want, just note that you’ll need to adjust the drawing coordinates to fit them into the video. The images used in this tutorial can be downloaded from here.
To this point, you should have a file structure similar to image below. Note our filters under img folder.
Next, open index.html and replace the localVideo tag with a canvas, as shown below.

Also update the script tag for client.js and add a new one for face-api.js.

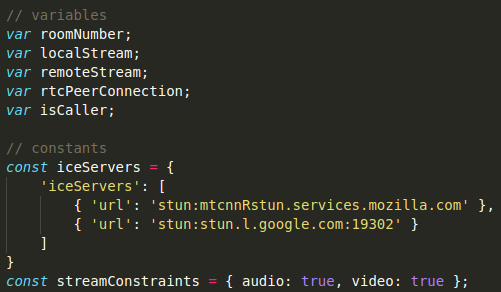
Now open js/client.js. We will begin by removing the reference to removed video tag and adding a reference for the canvas.
![]()
After that we will reorganize the code a little bit. First rearrange the variables and constants as shown below.
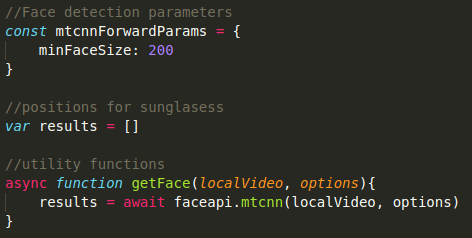
Next, we will set the parameters of our face detection mechanism and we will add an array to store its coordinates. We are also adding a function that will get such coordinates.
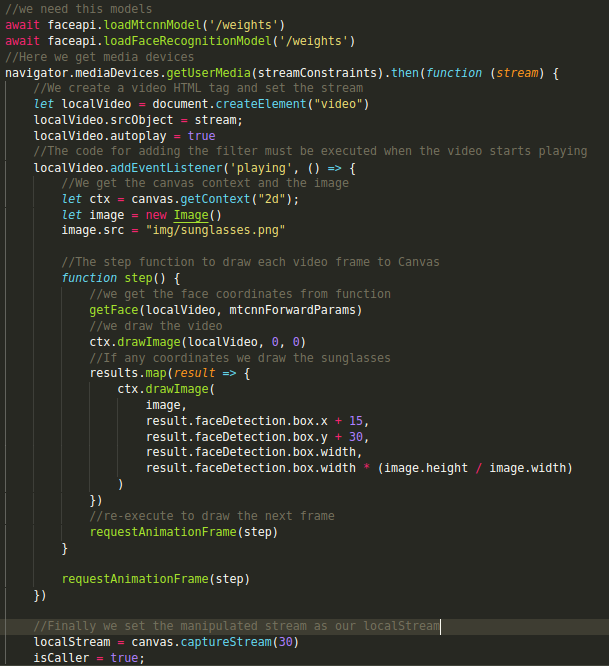
Now we are ready to apply the filter to our stream. For this tutorial we will set a fixed filter to each user, so User 1 will get normal sunglasses and User 2 will get some more styled ones.
The idea is that after we execute the getUserMedia API, we set the resulting stream to a video HTML tag. Then we would take that tag and draw it into a Canvas, and once there we would be able to draw the filter on top of it.
Finally, we would get the stream from the Canvas using the Canvas.captureStream method and assign it to our PeerConnection. The other user would receive the stream that has the filter.
In the base application, `getUserMedia` is executed both when User 1 has created a new room and User 2 has joined to it. We will use each one to set a different filter for each user.
Modify the getUserMedia code for the created event as follows.
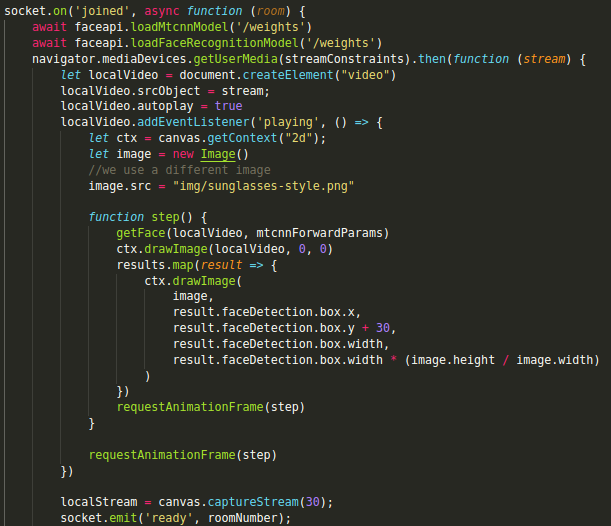
Also add the code to the joined event but this time specifying a different image.
Now we are ready to see our filters in action. Using the terminal navigate to project folder and run the application as follows.
npm install

node server.js
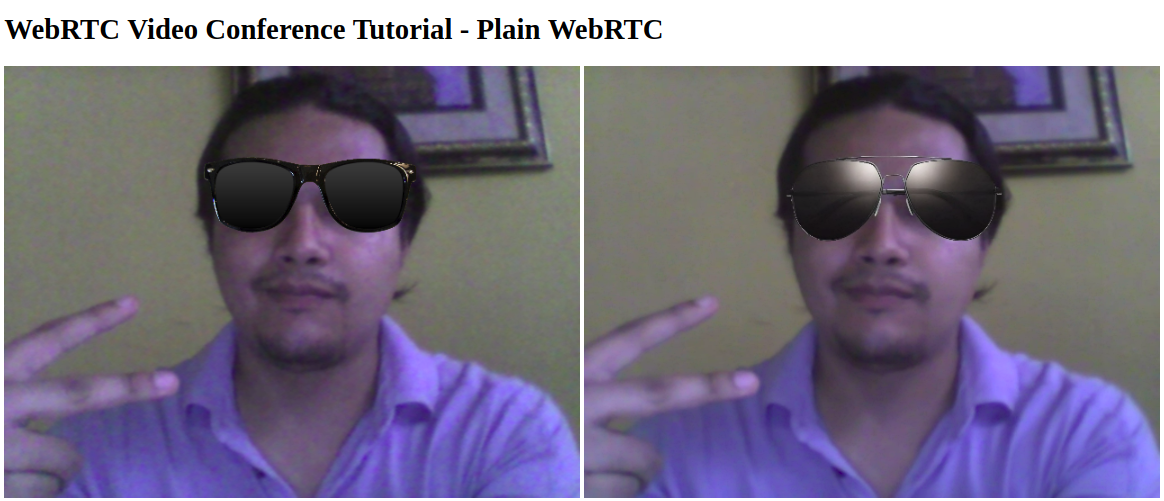
Then open two different Chrome windows and go to http://localhost:3000, enter the same room number in both of them and click “Go”. You should see something like this:
Conclusion.
As you can see, it is fairly simple to add fancy effects such as filters to a WebRTC application. Be sure to check our other tutorials if you want to know more about WebRTC.