The most important thing to keep in mind when developing any kind of communications platform is security. This is especially important when processing PHI, or protected health information, because HIPAA requires this information to be secured in-transit and at-rest.
Today, we’ll learn about a tool from our partners at Virgil Security that allows us to secure PHI. We’ll also take a look at the React Context APR and higher-order components for the React’s ecosystem.
Overview of the App
We will build a basic messaging app. While it won’t be production-ready, it will help you understand the basic flow of improving PHI security and protection in a messaging application. After users sign up, they’ll be able to exchange messages with other registered users. User authentication and message storage are handled with Firebase. Messages are encrypted using Virgil Security tools.
Setting up the Services
You’ll need a Firebase project and a Virgil account.
Setting up a Firebase Project
Follow these steps to set up a Firebase project:
- Log into your Google account. You can’t use Firebase without one.
- Head to Firebase console and click “Add Project.”
- Complete the required information and click “Create Project.”
- After the project is created, go to “Authentication” and click “Set up sign-in method.”
- Enable “Email/Password” and click “Save.”
Now follow these steps to create a Realtime Database:
- Click “Database.”
- Look for “Realtime Database” and click “Create database.”
- For security rules, select “Start in test mode” and click “Enable.”
Keep this tab open. We’ll come back to it in a minute.
Creating a Virgil App
Create an account on the Virgil Security page. Once you log in, it will ask you to create a new application. Give it a name and click “Add end-to-end encryption to product.” Then click “Create Application.”
Setting up the Backend
We’ll use Firebase to host the backend of our application. The backend will authorize the requests we make from our client to the Virgil Security platform.
Head over to the Github repo of the sample app provided by Virgil and follow the instructions there. After deployment, write down the URL of the new function. You’ll need it later. It will look like this:
https://YOUR_FUNCTION_URL.cloudfunctions.net/api
Get the Sample App
Now, head over to the Github repo of our application and clone it locally. We’ll make some changes to it.
First, open the src/components/EThree/withEThree.js file and replace the function’s URL with the one you wrote down. Make sure the URL ends with the “/virgil-jwt” prefix.
Next, we need to add our firebase credentials. Go to the Firebase project dashboard and click on “Project Overview.” Then click the icon to add Firebase to web applications. Set a name for the application and copy the credentials.
Now, open the src/components/Firebase/config.js.sample and paste the values. Rename the file to config.js.
How Encryption Works
When a user registers in the app, we also need to register them in the Virgil platform. Registration consists of creating a pair of public-private keys on the user’s device. The private key is stored on their device and the public key is uploaded to the platform.
Now let’s imagine a fictional conversation between two users, Sally and Molly. Both of them are registered in the app, so their keys are already created.
Sally hated the Game of Thrones finale and wants to tell Molly, so she writes a message and clicks “Send.” The application sends a request to the platform asking for Molly’s public key, which encrypts the message.
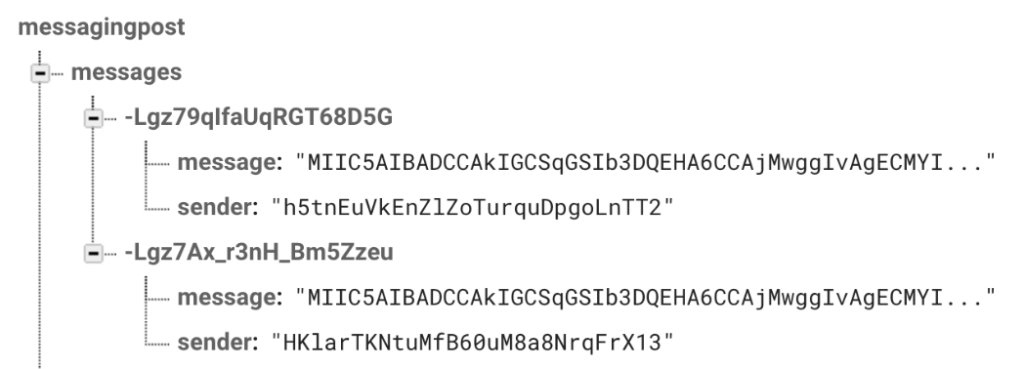
This encryption mechanism ensures that the text stored in Firebase’s database can’t be read by anyone except Molly. Because Molly has the private key that corresponds with the public key used to encrypt the message, she can decrypt Sally’s message and read it.
To make these requests to the platform, we need to create a client, authorize it with the backend, and make it available throughout the React application. This is where the React Context API and higher-order components come in.
React Context API & Higher-Order Components
React Context API allows us to pass Virgil’s client through React’s component tree without having to do so manually. Higher-order component is a technique that reuses the required logic to gain access to the client.
Context
Let’s review the files that make this possible. We’ll start with src/components/EThree/context.js.

Here, we simply create a new context called EThreeContext by calling the createContext function set to null.
To use this context, we need to define a provider to set the value and a consumer to use it. This definition is required on each React component that would use the value, so instead of repeating code, we will create a higher-order component that implements the logic and passes it to a regular component. The new component will have the required code to consume the value of the context.
Providing Value to the Context
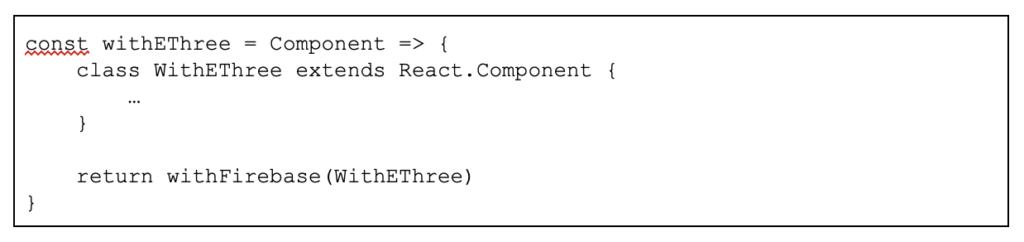
Our higher-order component is defined in the src/components/EThree/withEThree.js file. Let’s take a look at the steps taken to provide value to the context.
First, see how we comply with the aforementioned definition. Our component is a function that takes another component as a parameter and returns yet another component. We used another higher-order component to provide Firebase’s related logic.
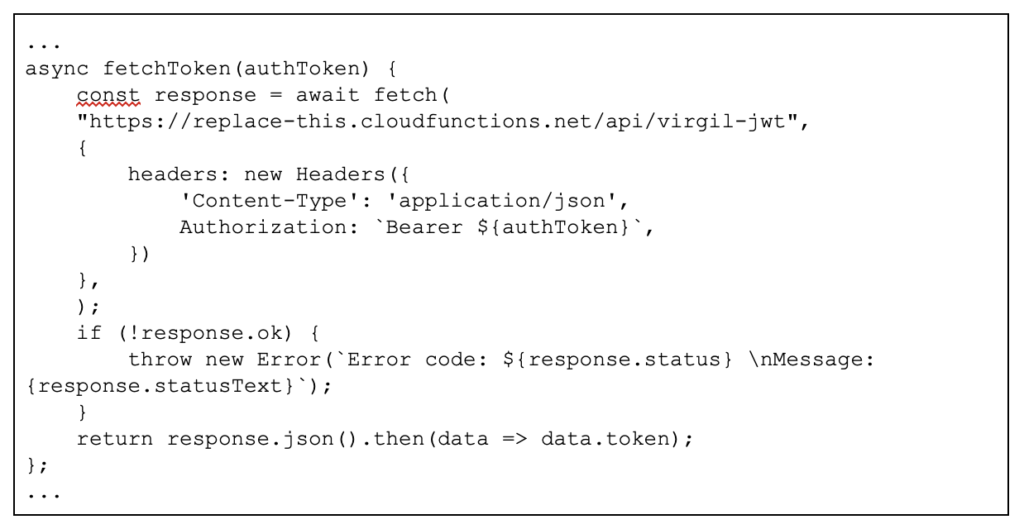
Once a user authenticates within the app, we initialize our client by sending a request to the backend function that contains the user’s identity. The backend returns a JWT token that enables our React application to make requests to the Virgil platform.
The response that the Virgil platform gives is asynchronous, so we create a promise to handle it. This promise is set to the state of the component.
We need to do all of this as soon the component renders. The componentDidMount function is the perfect place to do it.

The fetchToken function makes the request to the backend.
Finally, we add a provider in the render function so the component can consume the value of the context.

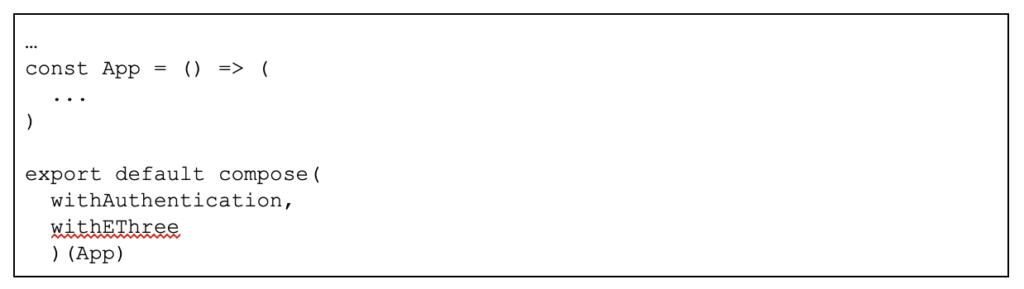
The last thing we need to do is wrap the higher-order component around the app. In the src/components/App/index.js file, we also set an additional component that provides our app with authentication capabilities. We’ll use the recompose module to set both of our components now.
Registering Users
Now that we have our client initialized, we can make authenticated requests to the Virgil platform. The first thing we need to do is register users with it. We will do that at sign-up.
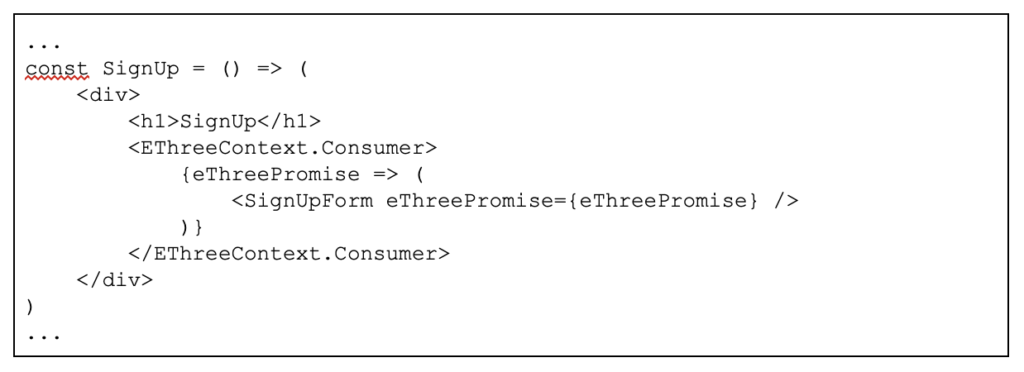
In the /src/components/SignUp/index.js file, we’ll create a consumer of the context and pass its value as a value to be used by the sign-up process.
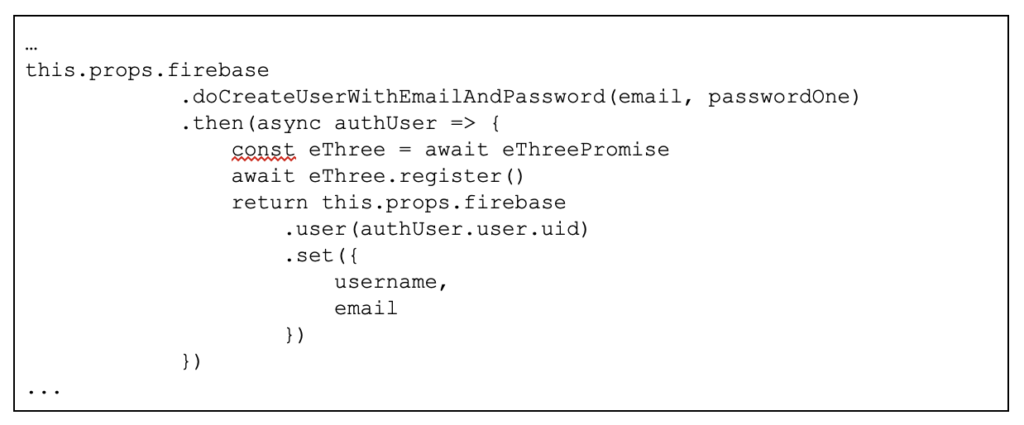
Then we call the register function after the user has been created.
Encrypting and Decrypting Messages
Now that users are registered, we’re able to encrypt and decrypt messages. To do this, we request the public keys of the users that are currently registered. We’ll use these keys to encrypt and decrypt the messages.
In the src/components/ChatRoom/index.js file, we can see the logic that sends messages and retrieves them from Firebase.

Running the App
Now we’re ready to see our application run. Using a terminal, navigate to the project folder and install Node dependencies. Then execute it.
Open two different browser windows, register two different users, and try to send a message.
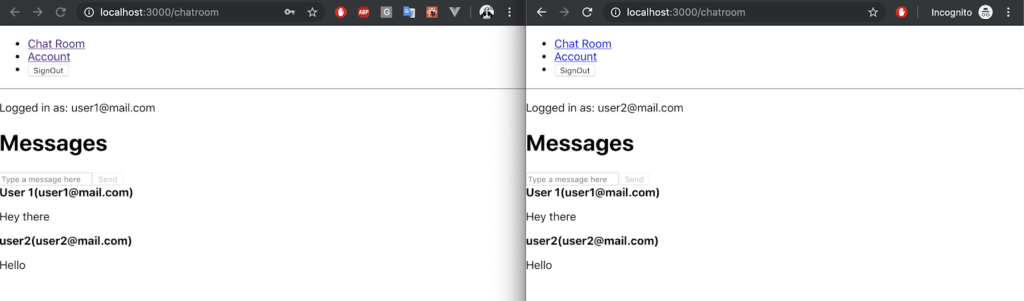
Let’s take a look at how these messages are stored on Firebase.
That’s it! You’ve learned the basic flow for building a secure messaging application for telehealth with React using Virgil Security, higher-order components, and React Context API. Thank you to Robin Wieruch for his awesome tutorial on Firebase authentication with React.
Contact us to learn more about how we can help you with your telehealth needs today!